Monday, 30 July 2012

Warm Poached Chicken and Pasta Salad

Warm Poached Chicken and Pasta Salad


This is another new recipe for me tried for the first time tonight and yes, okay, I know it's a lunch recipe- but here is the story... I had planned to do a particular chicken dish on Saturday but I had a busy day and was sooo tired so the cooking went out the window. So I moved that dish to tonight's menu instead, but then I happened to stumble across this recipe which was in the same cookbook as the other chicken dish and had almost identical ingredients but less cooking and preparation time. So I went for the lunch dish at dinner (it's monday night- so the less cooking time the better!). Good thing about it is, it will be GREAT cold tommorrow for lunch- and now I have a fancy pasta salad recipe to do for bbq's etc.

This is actually a weight watchers recipe, well it was, but as usual I didn't really follow the recipe 100% and made it my own. So here's what I did...

Time Taken?: 25 minutes

2 year old friendly?: Yep- he ate this one! Chicken and all!

Serves 4 (plus one 2 year old)

INGREDIENTS
400g chicken breast, fat trimmed and cut into palm sized pieces.
2 cups chicken stock (or water is fine if you don't have stock)
2.5 cups of Penne Pasta (the original recipe used wholemeal sprial pasta- but I didn't have any)
1 punet of cherry or grape tomatoes
1 cup of torn basil leaves
1 garlic clove, crushed
3 tablespoons lemon juice
2.5 tablespoons olive oil (or grapeseed oil as the original recipe had)
Goats cheese to crumble over the top (as much or as little as you like. Feta or ricotta would also work- depending on what you prefer. This wasn't in the original recipe but I added it after tasting the original feeling as if it needed a little more flavour and moisture)

METHOD
Put a large pot of water on to boil for the pasta.
Place chicken in a small saucepan and cover with the stock (or cold water)
Bring to the boil, and then reduce heat to medium-low and simmer for 6 minutes.
Remove pan from heat. Cover and set aside for 10 minutes or until chicken is cooked through. Drain and allow to cool before shredding with a fork.
Meanwhile, salt the boiling pasta water and cook pasta until al dente. Drain.
Whisk the garlic, oil and lemon juice in a large bowl.
Add the pasta, chicken, basil and tomatoes and toss to coat in dressing. Season with salt and pepper and crumble over some goats cheese. Toss again to combine.
Serve warm or cold.


Friday, 27 July 2012

Lamb on Rosemary Skewers

Lamb on Rosemary Skewers


This recipe was originally a weight watcher's recipe that I have adapted. It had pumpkin and was served with a cous cous. My hubby and I both don't like pumpkin,  so I did mine with more capsicum (the original had capsicum also) and have added some onion for some sweetness. Also, instead of cous cous (which hubby doesn't like), I reverted to my 'go to' grain, brown rice, which I squeezed some lemon over to serve. You could use the pumpkin and cous cous if you like.

I particularly like this one because we have rosemary in our backyard that always over grows so it's a good way to use up a good lot of rosemary at once (whereas usually you don't need much). It's also so very simple (you'll notice the 'method' section below is very short!) although it is a little fiddly to construct and takes time (I recommend it as a weekend dish).

Time Taken?: About 40min- 1 hour including all chopping and constructing the kebabs

2 year old friendly?: His little teeth are not quite up to cutting through the meat so sadly no, but I reckon this would be great for older kids as they could help make it.

INGREDIENTS
500g diced lamb (I get mine from the bucther pre-chopped, but you could buy a fillet and chop it yourself)
1 green capsicum
1 red capsicum
1 spanish onion
8 rosemary sprigs, stripped of all leaves (leaving on the tip for presentation) and cut at the bottom on the diagonal

METHOD
Cut the capsicums and onion into similar sized pieces, that are similar in size to the lamb
Thread the capsicum, lamb and onion pieces onto the skewers in a uniform order (I like to do red capsicum, lamb, onion, green capsicum, lamb, onion, red capsicum, lamb, onion, green capsicum, lamb. I end up with  4 lamb pieces on each skewer.)
Heat a grill plate or a barbeque to high heat and cook, turning, for 10 minutes, or until nice and charred and cooked through.

Wednesday, 25 July 2012

Lemon and Soy Chicken Breast

Lemon and Soy Chicken Breast


This is one of my old go-to recipes and one my mum used to cook a lot too. It's very simple but a good way to add flavour to some chicken breast while keeping it healthy and without having to marinate it all night or use fattening sauces. My mum always used thigh fillets which makes them more tender, but I like using chicken breast cause it makes it a very healhty meal (and I have always been a breast girl!). I have served it with my lemon crushed potatoes (see my 'sensational sides' blog) and a rocket, cherry tomato and spanish onion salad dressed only with balsamic vinegar (no oil tonight).

Time taken?: About 40 minutes all up including marinating time.

2 year old friendly?: Yes! (and I say this excitedly because my son never ever used to like chicken breast

This recipe makes about 5 or 6 serves (depending on how much chicken you eat- if you're anything like my hubby it's more like 4 serves!).

INGREDIENTS
1 kilo chicken breast, cut into smaller managable pieces and halved lengthways to make them thinner
1/2 cup soy sauce
The juice of half a lemon
A handful of continental parsely, roughly chopped
Extra lemon, to serve
Freshly cracked pepper

METHOD
Place the cut up chicken in a large bowl
Pour over the chicken the soy sauce and lemon juice, and add the parsely and some freshly cracked pepper to taste
Mix to coat the chicken and combine all of the ingrediants.
Refrigerate for 10-15 mins to allow the flavours to penetrate
Heat a griddle pan or large fry pan to a medium-high heat (alternatively, cook them under a grill).
Cook the chicken in batches until cooked through.

Sunday, 22 July 2012

Angel Hair Pasta with Sun-dried Tomato and Goats cheese

Angel Hair Pasta with Sun-dried tomato and Goats cheese


I saw this recipe years ago on the show "Everyday Italian" and used to cook it a fair bit, but I haven't cooked it in years until tonight! It's a very VERY flavoursome dish, although tonight I think I did 2 things wrong- one was slightly overcooking the pasta (Angel Hair takes no time at all) and two was not adding enough of the pasta water at the end. Both resulted in a slightly dry dish, so my tip is to avoid those two things and it'll be absolutely perfect!

It's definately a treat dish, cause while it's not the worst thing you could have it does have a few calorific features, probably a little higher in calories than everything else I cook. Having said that though, the good thing is that it's quite filling so whilst this recipe says it serves 4, it actually probably serves about 6.

Time taken?: 20 minutes (but this one is go go go the whole time as everything is very quick)

2 year old friendly?: Yes- but be warned it's VERY MESY! Be prepared to find angel hair pasta everywhere! ;-)

INGREDIENTS
1 250g- 300g jar of sun-dried tomatoes packed in oil, chopped (oil reserved)
1 small onion, chopped
4 garlic cloves. minced (i left these out of mine tonight as the sun-dried tomatoes i got were marinated in garlic)
1/4 cup of tomato paste
2/3 cup dry white wine
1 packet of angel hair pasta
100g soft fresh goats cheese
2 tablespoons chopped fresh continental parsely

METHOD
Put a large saucepan of salted water on to boil for the pasta
Heat 2 tablespoons of the oil from the sun-dried tomatoes in a large frypan over medium heat.
Add the onion saute until tender (about 3 mins).
Stir in the garlic and saute for about 1 minute until fragrant.
Add the tomato paste and cook for 2 mins, stirring constantly.
Add the wine and sun-dried tomatoes and simmer until liquid reduces by half (about 2 minutes)
Cook the pasta in the salted water, and when al-dente, drain, reserving about 1/2 a cup of cooking liquid.
Add the pasta to the tomato mixture and toss to coat, adding some of the reserved cooking liquid to moisten.
Season the pasta with salt and pepper to taste.
Sprinkl with the goats cheese and parsely and toss. Mound the pasta into bowls and serve.

Friday, 20 July 2012

Foil-Baked Salmon with Lemon, Parsely and Tomato

Foil-Baked Salmon with Lemon, Parsely and Tomato


This is probably one of my favourite dishes. It's so healthy and so easy, but packs some great flavour! I love cooking it on a friday night cause it feels like a nice end-of-week treat (even though it's healthy) and is great with a nice glass of wine (and I have fridays off so I can go to the fish shop!).  I serve it with brown rice and asparagus. I prepare the asparagus by tossing in a little olive oil and then throw them in a hot pan, turning until the skin just starts to blister, and then I add some salt and freshly cracked pepper- delicious!

Time taken?: This took as long as the rice takes to cook, so about 30 mins (cause it's brown rice), but the salmon takes about 2 minutes to prepare before putting in the oven and the asparagus takes only about 5 mins in the pan, so very little effort required!

2 year old friendly?: He does eat it sometimes, but I have actually stopped buying extra for him as it's too expensive for him to only eat half the time. I usually make him some fish fingers and give him some of my salmon if he wants some.

The below recipe makes 2 serves

WHAT YOU NEED
2 salmon fillets, scaled and pin-boned (I prefer skin on, but you can also get skin off)
1 lemon
About 1/2 punnet of grape tomatoes, halved
About 2 tablespoons chopped parsely
2 bunches of fresh asparagus to serve with (prepared as above)

METHOD
Pre-heat oven to 200 degrees celcius.
Take 2 pieces of foil big enough to wrap one salmon fillet each in, and spray the middle of them with oil spray
Place the salmon fillets skin side down on the foil
Sprinkle the salmon with the parsely and then place the halved cherry tomatoes on top of each fillet, cut side down.
Season each fillet with freshly cracked pepper and the squeeze the juice of half a lemon on each fillet.
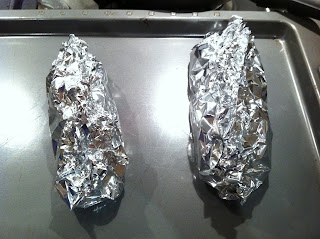
Enclose each fillet in the foil like this...


Place the fillets on an oven tray and bake in the oven for 15 minutes or until nicely cooked through.
Serve on a bed of brown rice with asparagus. Squeeze more lemon over the fillet just before serving if preffered.


Thursday, 19 July 2012

Sensational Sides

Sensational Sides
Lemon and Mustard Crushed Potatoes, 4 Bean Salad


Tonight I just did some very simple grilled steak, and so in order to make it more interesting I made these 2 flavoursome sides. The great thing about both of them are that they're not only simple, but they're great "end of the week" sides, for when it's been almost a week since you've done the grocery shop and you're out of fresh lettuce leaves or vegies to go with your proteins. They're also vegan- I used no butter or milk or anything.

Time taken?: 20 minutes (mostly the time it takes for the potatoes to cook- so you can prepare your other things while they're in therea)

2 year old friendly?: The potatoes are, but I haven't yet been able to get him to eat the beans.

LEMON AND MUSTARD CRUSHED POTATOES
(this is a Jamie Oliver recipe- he's so great with flavours! I did a simpler version of these in my first blog)

700g baby potatoes, washed
1/2 a lemon
1 heaped teaspoon of wholegrain mustard
Olive oil
A handful of chopped, fresh flat leaf parsely (this is in Jamie's recipe but I didn't have any so didn't use it)

Chop in half any of the big potatoes and stab the smaller ones and put them in a microwave safe bowl
Add salt and pepper and the half lemon (not squeezed, just put the half lemon in the bowl)
Cover with a double layer of clingfilm
Put in the microwave on high for 17 minutes or until cooked
Once they're cooked, carefully peel off the clingwrap and discard the lemon half. Add the mustard and a cook glug of olive oil (and the parsely if you have it). Crush with a fork or the back of a spoon and mix to combine all the ingrediants. Season with more salt and pepper if needed.

4 BEAN SALAD

1 can of 4 bean mix (it's important to get a good one. I use Edgel. I have tried the Aldi brand before and they're terrible!)
2 fresh tomatoes, diced
About 1/4 of a small spanish onion, sliced very thinly
Olive oil
Balsamic vinegar

Drain and rinse the beans to get rid of the briney taste
Put into a salad bowl with tomatoes and onions
Season with a good pinch of salt and freshly ground pepper
Dress with olive oil and balsamic vingear to taste

Tuesday, 17 July 2012

Quick Chicken Cacciatore

Quick Chicken Cacciatore


So I have a confession to make. Tonight I was going to use a jarred chicken cacciatore simmer sauce. I buy the Chicken Tonight brand and usually just add some mushrooms to that and it tastes fine- great actually. I really do like the taste.

But I after i had put some rice on, cut up the chicken and sliced the mushrooms, I went to the cupboard and NO chicken tonight jar! We left a bag behind at the grocery store and it must have had the jar in it. Now by this stage it's late. It's a night when hubby is out, and after picking up Mr 2 Year Old from daycare i had to search the house for a costume for him to wear tommorrow cause I forgot it was letter dress-up day.  And then I realised my salt and pepper grinders were both out of salt and pepper so I had to re-fill them. And then I had to empty the diswasher, and of course Mr 2 year old was delaying the process by trying to "help" and then wanting to be picked up and wanting a snack etc etc. And so on and so on.

Now I do have a recipe for chicken cacciatore, but it takes ages and has a lot of ingredients. So I thought "you know what- I can do this", and I looked in my pantry and just made it up. And to my surprise, it was easy, quick, and tastes exactly like the jarred version! And that's a good thing, cause as I said earlier I like the jarred version. So maybe I actually don't need to buy the jarred version anymore!

I served it with white rice and green beans.

Time taken?: I reckon without all the fiff faff it's about 30 minutes including chopping.

2 year old friendly?: Actually yes, very much so. I think apart from pasta this is one of his favourite dishes. Of course he wouldn't eat the beans, but at least there are mushrooms in the sauce.

WHAT YOU NEED
500g chicken breast or thigh fillet, cut into cubes
1 700ml jar of passata
1 cup mushrooms, sliced
Some dried thyme and basil (one of the few situations where dried herbs work better than fresh)
3 tablespoons olive oil

METHOD
Heat oil in a large saucepan
Cook the chicken until browned
Add the mushrooms and stir for a minute until mushrooms start to soften a little
Add the passata and a very generous spinkling of the herbs. Season with salt and pepper.
Simmer, covered, for about 10 minutes, stirring occasionally
Remove lid from saucepan and cook for a further 5 minutes to reduce sauce slightly.
Serve over some white rice.

This makes about 4 serves, plus a toddler serve (so that means leftovers for lunch!)

Monday, 16 July 2012

Pasta with a basic Tomato and Basil sauce

Pasta with a Basic Tomato and Basil Sauce
(with hidden vegies... shhhhh!!)


This is such a quick pasta sauce you'll never buy pre-made sauce again! I have hidden zucchini in mine tonight cause that's what I had in the fridge , but you can pretty much add ANY vegie to this if you dice it up fine enough. Or don't add any and just have the sauce on it's own.

There is also another indregient in this that needs mentioning, and that's anchovies. Of course if you're allergic or vegetarian you can leave them out (just make sure you add salt instead), but if not, whether you like them or not, PUT THEM IN!!! They completely disintegrate and you can't taste them as anchovies, but they add such a depth of flavour that you really need in a simple sauce like this. They really will make a lot of difference. So do it okay!!!

Also it's important to use a good brand of canned tomatoes. I use 'Androma'. If you get a bad brand it will be too watery.

Time taken?: 20 minutes.

2 year old friendly?: Yep. My boy loves his pasta!

INGREDIENTS
1 500g packet of Penne Pasta
3 tablespoons olive oil
1 can of canned chopped tomatos
1 can of canned whole peeled tomatoes
1 medium brown onion, diced finely
2 cloves garlic, crushed
1/2 zucchini, diced finely (or any vegie/s)
3 or 4 anchovie fillets
A handful of fresh basil, torn into pieces.
Freshly grated parmesan, to serve


METHOD
Put a large pot of water on to boil for the pasta
Put olive oil, garlic and onion in a medium saucepan and cook, stirring until onion starts to go transparent.
Add zucchini and anchovies and cook, stirring, until anchovies are disolved.
Add the 2 cans of tomatoes, breaking up the whole ones with a wooden spoon or potato masher once cooking in the saucepan.
Add pepper and half of the basil leaves. Bring to boil and then turn heat down to simmer.
Meanwhile, your pasta water should be boiling. Add a generous handful of salt and then the pasta, stirring initially to seperate.
When pasta is cooked, drain pasta, return it to the saucepan and add sauce (it should have reduced slightly while the pasta was cooking- this is all it needs). Stir the sauce through the pasta to combine well and then add the remaining basil leaves.
Serve topped with lots of freshly grated parmesan.

Sunday, 15 July 2012

Homemade Hamburgers

Homemade Hamburgers


A very quick and easy one- and I imagine great fun for older kids as they can construct their own burger at the table. Everyone has their own favourite burger recipe and this is mine cause it requires very little ingredients and fussing and is very quick but still tastes good. And there are no breadcrumbs used in the patty- so you could use gluten free worchestershire sauce (as I do- just cause thats the brand I buy) and make them into gluten free rissoles.

Make the patty recipe below and then what you put on the burgers is up to you! I keep it simple, I do some sauteed onions, tomato sauce, tomato, lettuce and of course the cheese I melt onto the patty (as below), and i also fry up a bit of bacon for hubby (I prefer without). You could also use any burger bun you like. As you see above, this time I have used the standard traditional bun, but turkish rolls are nice too.

The recipe makes 4 patties.

Time Taken?: About 30 minutes. And that included cleaning the kitchen before i started and the preparation of all the other burger toppings and buns etc.

2 year old friendly?: Yep, sure is! I make my little one a smaller and thinner patty, and put only a little bit of salad on the burger so it's not so high and then I cut it into managable wedges (like you'd cut a cake). He usually eats about half, and then I help him with the rest! ;-)

WHAT YOU NEED
500g mince beef
Worchestershire Sauce
Ground Cumin
1/2 spanish onion (brown onion is fine to use too if that's what you have)
4 slices of low fat cheddar cheese

METHOD
Chop the onion into a very very fine dice (almost minced)
Add it to the mince along with about 5 shakes of worchestershire sauce and about 1/2 teaspoon of ground cumin (sorry I don't measure this one!)
Mix together with your hands to fully combine
Divide the mixture into 4 and roll each quarter into a ball before pressing into a patty shape and transferring to a plate
Refridgerate patties while preparing the other ingredients for your burger (this is when i fry my bacon, saute my onions, slice my lettuce and tomato and pre-heat the grill on my oven for the buns. You only need to refridgerate them for as long as this takes).
Pre-heat a non-stick griddle pan or fry pan until very hot
Add the patties (no oil needed) and cook for about 4 minutes on each side or until cooked to taste.
About 1 minute before the end of cooking on the 2nd side, place a slice of cheese on each patty to melt it.
Serve with toasted buns and any toppings you like.


Saturday, 14 July 2012

Tandoori Chicken Skewers with Yoghurt Mint Sauce

Tandoori Chicken Skewers with Yoghurt Mint Sauce


I have taken this recipe directly out of "The Biggest Loser" cookbook, and haven't really needed to modify it apart from the cooking method slightly. This is a weekend dish, merely because the skewers need 2 hours to marinate, but it's really tasty and dead easy. It is a bit spicy. If you like spicy food it's nothing, but I don't like spicy food and I can only JUST handle the spice in this one. I need lots of the yoghurt dressing to help it along!

I have broken it down into time frames to make it easier- so you're not caught out.

Time Taken?: Once you start cooking (i.e. marinating has happened) it's very very quick. About half an hour, probably less, including cooking the rice (and depending on how you cook the rice).

2 year old friendly?: No, it's too spicy. But use this as a special adult treat and pop some chicken fingers or fish fingers in the oven for little one. It is a weekend after all!

INGREDIENTS
500g chicken tenderlions
1/4 cup tandoori paste
1/4 cup Light & Creamy Coconut Flavoured Evaporated Milk
200g low-fat natural yoghurt
2 tablespoons chopped mint leaves
1 tablespoon lemon juice
1/2 teaspoon sumac, plus extra to serve
2 cups steamed rice to serve
10-16 bamboo skewers (one per tenderloin)

2.5 HOURS BEFORE SERVING
Soak the skewers in water for 30 mins

2 HOURS BEFORE SERVING
Thread the chicken tenderloin pieces onto the prepared skewers and place in a shallow dish.
Mix together the tandoori paste and evaporated milk and pour over chicken. Turn to coat.
Cover with plastic wrap an refridgerate for 2 hours to marinate

30 MIINUTES BEFORE SERVING
Put your rice on to cook
Place the yoghurt, mint, lemon and sumac in a bowl and mix well
Heat a non-stick fry pan (I use my large griddle plate as it fits all skewers on it) over medium heat.
Cook the chicken skewers for 3 minutes on each side until browned and cooked through (the book says to baste them regularly with marinade, I don't as I don't like them too spicy).
(NOTE: I always find they do stick a little to the pan even with a non stick pan as the sugar in the marinade burns easily. Having the pan not too hot helps, but if they do stick a litle and the marinade burns a bit, don't sweat it, they still taste good!).
Sprinkle the tandoori chicken skewers with a little extra sumac and serve with the yoghurt sauce and steamed rice.

Friday, 13 July 2012

Mummy's Treat Breakfast

Mummy's Treat Breakfast ('Healthy' French Toast)


Background Story: So I know I usually do dinners on this blog and it's usually for the family, but on this beautiful saturday morning hubby was in bed (cause it's his turn to sleep in) and I was up with the little one and I felt like a nice brekky. Everyone deserves a little treat every now and then so this is one for you to all cook for YOURSELF. 

I say 'healthy' french toast, cause I have tried to replace most of the naughty ingredients with less naughty ones so it ends ip being better than the ones you'd get at a restaurant or cafe.

Time taken?: About 10 minutes

2 year old friendly?: Who cares! This is all mine! He has eaten this before, but i have found he prefers his toast the regular way so I made his brekky first (1 piece of wholemeal toast with peanut butter and chopped up fresh strawberries with a glass of milk), and while he was busy eating I got to work.

WHAT YOU NEED
2 pieces of 'Pane Di Casa', or any dense bread, preferably a few days old (we buy Pane Di Casa and keep it in the freezer). NOTE: I have done this with regular sliced bread but not with while cause it's too soft- wholemeal is better and thick cut not thin.
2 eggs
A splash of skim milk (sorry, i never mesure for this recipe!)
About 1/2 teaspoon ground cinnamon (optional)
About 1 teaspoon Splendor granules (or castor sugar if you don't have it)
About 1/2 tablespoons of Nutelex (or low fat margarine or spread)
Fresh strawberries (or bannana works well too)
Golden Syrup (honey or maple syrup would also work)

METHOD
Crack eggs into a medium shallow bowl with the skim milk and beat lightly with a fork.
Add the splendor and cinamon and beat again just to combine
Soak the bread in the egg mixture (both sides) for a few minutes
Heat the Nutelex in a medium frypan and then when almost melted, add the bread.
Cook until starting to get a golden brown crust on the bottom and then turn and do the same for the other side.
Once golden brown, remove to a plate and top with a drizzle of golden syrup and chopped fresh strawberries.

Serve to yourself with a nice cuppa and have a lovely saturday morning!

Wednesday, 11 July 2012

Honey Soy Drumsticks

Honey Soy Drumsticks


Also known as hubby's favourite! This is one of those dishes you do very little to. Prepare it, chuck it in the oven, and forget about it for a while! And it's very tasty for very little effort.

As you see above I served the drummies with brown rice and mixed leaf and cherry tomato salad (dressed as usual with salt, olive oil and balsamic vinegar). I like to drizzle the pan juices over the finished chicken and the rice as a kind of gravy. Makes it extra tasty!

Time Taken?: 50 minutes (yes it's a little longer to make than most, but at least you can do things while it's cooking)

2 year old friendly?: Yes if you take the meat off the bone and mix it in with the rice and a bit of the juice, your 2 year old SHOULD love it. Should- but sadly mine was being a fuss pot tonight and only had 1 mouthful- instead insisting on a bannana. (I rekcon if i tried it again in a week or so he'd eat it!).


WHAT YOU NEED
1.2kg (or 8) chicken drumsticks
1/3 cup of soy sauce
1 1/2 tablespoons of honey
1 tablespoon of butter (to make it a bit healthier I used nutelex for this one- which is low fat no dairy butter- it's what I use on my toast etc)


METHOD
Pre-heat oven to 200 degrees c
Spray an oven tray and put the drumsticks in it (small enough so that the drummies are close together but big enough so they're on a single layer)
Heat butter in a small saucepan
Add the soy sauce and the honey and bring to a boil, stirring to combine
Immediately pour the sauce mixture over the drumsticks and turn the drumsticks a few times to coat well in the sauce.
Cover with foil and put into the oven for 30 mins or until almost cooked through
Take drumsticks out of the oven, take off the foil. Turn the drumticks a few times to coat in the sauce and put back in the oven, uncovered, for 10 more minutes or until cooked through.


Tuesday, 10 July 2012

Tomato and Tuna Pasta Bake

Tomato and Tuna Pasta Bake


Now I had not planned to cook this tonight, but the chicken I was going to cook had not de-frosted in time so I had to put something together with what I had and this was it. I must say- it was a total winner! I have never done it before, it's my mum's recipe, but after a quick call to mum and a clarification I had everything in the fridge/panty, less than 40 mins later it was done and on the table! I served it with a nice mixed leaf salad dressed simply with salt, olive oil and balsamic vinegar.

Time taken?: As stated above- about 40 mins! Probably less if you're more organised.

2 year old friendly?: Aboslutely! This is probably the best my little man has eaten in weeks. He WOLFED it down!

This makes a LOT of pasta, I'd say about 6 serves. You will have plenty for lunches and leftovers!

WHAT YOU NEED
2 tablespoons of olive oil (if you're measuring, if you're not a really good glug!)
1 medium brown onion, finely chopped
2 cloves of garlic, crushed (this is not in my mum's recipe, she is allergic, so you can definately leave it out!)
1 jar of Passata (700ml)
1/4 cup water
1 500g packet of Penne Pasta
2 small cans or one big can of tuna (Mum used Tuna in olive oil which she doesn't drain, I used tuna in springwater cause it's all I had, but I drained it really well to get the briney taste out- still tasted great in the end)
A couple of really good handfuls of light chedder cheese
Some grated parmesan (optional)

METHOD
Put a large saucepan of water on to boil for the pasta
Pre-heat oven to 200 degress c
Heat oil in a medium saucepan
Cook garlic and onion, stirring until soft
Add Passata and water season with salt, pepper and a pinch of sugar (to reduce acidity)
Cover and bring to boil, then turn heat down to simmer steadily for about 15-20 mins, stirring occasionally
Meanwhile, add a large handful of salt to the boiling water and add pasta, cooking until all-dente
After sauce has reduced a little and thickened, add tuna and simmer for a couple more minutes to heat and combine tuna.
Drain boiled pasta when ready and return to pan. Add the sauce and stir it through.
Pour pasta into an oven dish. Grate some parmesan over the top and then top that with a generous amount of the light chedder (this is to taste).
Put uncovered into the oven and bake until cheese is melted and forms a slight crust.

Sunday, 8 July 2012

Chicken, Pea and Mushroom Risotto

Chicken, Pea and Mushroom Risotto


This recipe is a hodge-podge of different risotto recipes that I have taken the bits I like out of to make MY perfect risotto.

I use a pressure cooker for mine, not only cause it's quicker but I think it makes the risotto turn out creamier. If you don't have a pressure cooker, I will include the instructions for without one also.

This would also work well as a vegetarian dish, just take out the chicken and replace the chicken stock with vegie stock.

The following recipe is enough for 4 really good sized portions, 5 smaller ones. It does say to serve immediately, but I still think it's yummy for lunch the next day! It's a good one for sunday night cause there are enough leftovers for you and your partner to take to work for lunch the next day.

Time taken?: Even with the pressure cooker, I'd say this is a weekend dish. It takes about 1 hour all up, a little less for the pressure cooker and a little longer using the standard method. That includes all the prep. With the pressure cooker- you at least get to clean up and do other things while it's cooking, whereas with the standard method you have to constantly stir it.

2 year old friendly?: Yes usually, although mine wasn't feeling well tonight so he didn't eat much. He usually loves the cheesy creaminess!

TIP: Pre chop eveything- once you start cooking to need to add everything pretty quickly. Even make sure you pre-grate your cheese and de-frost your peas before you start cooking.


INGREDIENTS
1 litre (4 cups) chicken stock
1 cup of water (standard method) or 1/2 cup water (pressure cooker method)
50g butter
600g chicken breast, sliced into bite sized or stir-fry sized pieces
4 green onions, sliced thinly.
1 clove garlic, crushed
1.5 cups of aborio rice
1 cup frozen peas, thawed
1 cup sliced mushrooms
1 cup finely grated parmesan
1 tablespoon finely chopped mint (if you don't have mint, parsely works well also)

PRESSURE COOKER METHOD
Heat half of the butter in the pressure cooker (on the browning setting if electric) and brown the chicken (until JUST browned)
Remove chicken from the pressure cooker.
Heat the remaining butter in the pressure cooker (without washing it) and cook the onions, garlic and mushrooms, stirring until soft.
Add the rice, stir to coat in onion mixture
Add the stock and the water. Close the lid of the pressure cooker and set it to high pressure for 7 minutes.
Release pressure and remove the lid.
Add the chicken and peas and allow it to stand, with the lid on, for 5 minutes.
Add the mint and cheese.
Serve immediately.

STANDARD METHOD
Place stock and the water in a medium saucepan and bring to a boil. Reduce heat and allow it to simmer very gently, uncovered.
Heat half of the butter in a large saucepan and brown the chicken until JUST browned.
Remove chicken from the saucepan and in the same pan, cook onion, mushrooms and garlic, stirring until soft.
Add rice, stire to coat in onion mixture.
Add 1/2 cup of the simmering stock mixture, cook stirring over low heat until stock is absorbed.
Continue adding stock in ladelfuls, stirring until stock is absorbed after each addition.
Return chicken to pan half way through cooking time.
Total cooking time should be about 35 mins or until rice is tender.
Add peas to rissotto, stir gently until peas are hot.
Remove from heat; stir in cheese and mint.
Serve immediately.


Saturday, 7 July 2012

Mini-pita pizza

Mini-Pita Pizzas


This one is hubby's favourite (and not just cause of the taste, but because there is hardly any washing up- and he's the dishwasher in our house!).

It's so quick and easy it's barely a recipe- but it's an idea and that's what this blog is all about!

How long from start to finish?: 20 minutes. Seriously! Sooo quick.

2 year old friendly?: Absolutely! A great way to hide vegies!

WHAT YOU NEED
Wholemeal mini pita breads- about 1.5- 2 per adult (depending on appetite) and 1 per child. I use the Bazaar brand cause they're quite thick and hold together better.
Passata (which is in the pasta sauce section of the supermarket in a jar- basically tomato puree which is prepared differently to the canned one).
Light grated cheese
Any toppings you wish!!

TO PREPARE
Pre-heat oven to 200 degrees C
Place the pitas on an oven tray covered with baking paper.
Spread the passata thinly and evenly on the pita breads.
Add cheese and toppings
Put into oven for 10- 12 minutes or until cheese is metled and golden brown.

HEY PRESTO!


Topping ideas...

Hubby's favourite: Put the cheese on first and then top with sliced Proscuitto, halved cherry tomatoes and a bit of fresh basil (pictured above on the left)

What I like to make for Mr 2 year old: Finely slice, chop or grate any vegies handy (most typically I would use zucchini, carrot and/or capsicum. Someimes with mushrooms). Top with lots of cheese.

My favourite: I like to use slices of bocconcini cheese when I have it instead of grated cheese and top with halved cherry tomatoes and basil. I also like to do mushrooms and capsicum with regular cheese.

Friday, 6 July 2012

Steak with salsa versa, crushed potatoes and green beans


Steak with Salsa Verde, Crushed Potatoes and Green Beens


For my first recipe I am going to share with you one of my favourites. Steak with Salsa Verde.

Salsa verde is an easy, no-cook and zesty little sauce/marinade/rub that is so versatile. Don't let the anchovies put you off!! I myself love anchovies, but hubby doesn't and he LOVES this dish. They add a depth of flavour to the sauce. Tonight I have used it on Steak, but you can use it on chicken also (in fact- that's how the original recipe i got it from used it).

I served it with crushed potatoes and Green Beans.

How long from start to finish?: Took about 40 minutes, but I was taking my time and also chopped everything for the salsa by hand. If you wanted to use a little blitzer it would halve the time.

2 year old friendly?: Sadly, no. The flavours a little sophisticated and my little one hasn't quite graduated to steak. This is one of those nights I popped some crumbed fish fillets in the oven for him (all natural ones please!) but he loves them!

The recipe:

SALSA VERDE
1/2 cup coarsely chopped fresh flat-leaf parsely
1/2 cup coarsely chopped fresh mint
1/3 cup olive oil
1/2 cup lemon juice
1/4 cup drained capers, chopped coarsely
8 anchovy fillets, drained, chopped finely
2 cloves garlic, crushed

TO SERVE WITH

1 x 250g scotch fillet per person (or whatever meat you like really) (the salsa verde would probably be enough for 6 serves of meat. I did it for 2 and had plenty left over).
Baby potatoes (however many you'd usually serve for your family)
Green beans (again however many...)

First, cut potatoes in half and put them in a microwave safe bowl. Season them with salt and pepper and cover them with a double layer of clingfilm. Put in the microwave for about 17 minutes on high or until cooked through.

Put a pot of water on to boil for the beans.

Mix together the ingrediants for the salsa in a medium bowl. 'Bash out' the steak with the palm of your hand to tenderise. Add a some of the mixture to the raw steak as a marinade and coat.

Cook steak on a pre-heated griddle pan to your liking. Add beans to boiling water 5 minutes before serving time.

When the potatoes are done, carefully peel off the cling wrap, add a little bit of olive oil to moisten and crush with a fork.

When all done, season the beans with salt, pepper and a drizzle of olive oil. Serve steak and potatoes drizzled with the remaining salsa.

YUMMO!